Brands
3Com
Alcatel-Lucent
Allied-Telesis
Avaya
Brocade
Cisco
D-Link
Dell
Emulex
Enterasys
Extreme
Force10
Foundry
H3C
HP
Huawei
Intel
Juniper
Linksys
Marconi
McAfee
Netgear
Nortel
Planet
Qlogic
Redback
SMC
Sun
TRENDnet
Vixel
ZTE
ZyXEL

MCC14-2

14-slot Rack for Stand-alone Media Converters with Dual Power Supply Media Converter Chassis
Model: MCC14-2
Availability: In Stock
Average Rating: Not Rated
Price:
$240.00
Qty:
- 1 +
+
Add to Cart

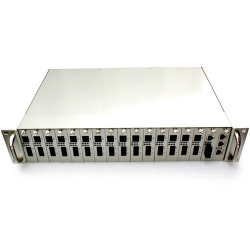
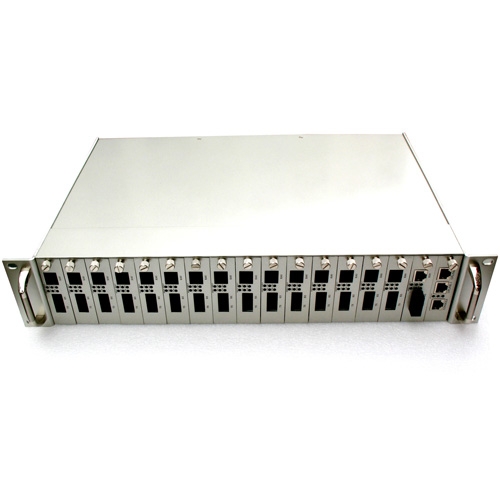
The 14 slots media converter chassis supports plug-and–play installation of stand-alone media converters convert modules ,can hold at most 14 pieces media converters.

Features

  • Versatile chassis for multiple converter installations
  • Fourteen/Sixteen front panel slots for FHC Media Converters
  • 19-inch Rack Mount
  • Optional redundant power supply
  • Plug and Play Operation
  • LED Indication for Primary and Secondary Power Supplies
  • LED Indication for Converters
  • Metal Case


Specifications

  • Number of Ports: 14 slots for standalone media converter
  • Input Power: AC 100V-260V or DC 48V
  • Redundant Power: Yes
  • Output Power: DC 5V, 12A
  • Diameter of DC Plug: 2.5/5.5 mm
  • Ripple: ≤50 Mv
  • Noise: ≤50 Mv
  • Weight: 5Kgs (Net Weight)
  • Safety Standards: UL, CSA, FCC Part 15 Class B, CE
  • Operating Temperature: 0℃ - +50℃
  • Storage Temperature: -20℃ - +85℃
  • Humidity: 5% - 95%
  • Dimension: 485 x 231 x 90 mm (WxDxH)


Installation

  • 1. When you unpack this product package ,please check the devices with packing list .
  • 2. Install the converter chassis in a standard 19” cabinet and fix it .
  • 3. For 14 slots media converter chassis: Unscrew two screws from the side next to the RJ45 port of the media converter .Then use these two screws to fix the carrier given with this option onto the side of media converter ,leaving the bigger side of the screws ahead. Then insert the converter to the chassis ,make sure the power plug of chassis is inserted in the power port of media converter . When the converter is fully and firmly fit the chassis ,fasten the screws on the carrier .Follow the above steps ,install all necessary converters in the chassis, then block up any slots not for use temporarily .Then go to step 5 .
  • 4. For 16 slots media converter chassis: Insert the card-type converter to the guide rails of the slot ,leaving the bigger side of the screws ahead .Make sure the power plug of card-type converter is inserted in power port of chassis. When the card-type converter is fully and firmly fit the chassis ,fasten the screws .Follow the above steps ,install all necessary card-type converters in the chassis, then block up any slots not for use temporarily .Then go to step 5 .
  • 5. Insert the RJ45 twisted pair to the electrical port of converter ,and insert the fiber to the fiber port of the converter .Then connect the supplied AC to DC power adapter to the receptacle at the back of the chassis ,attach the plug into a standard AC outlet with a voltage range from 100 to 260 Vac or a DC outlet with a voltage of 48 Vac. Then turn the power switch on ,the POWER LED Lamps in the chassis will on and at green color.( For 14 slots media converter chassis, the POWER LED Lamp is in front side. For 16 or 17 slots media converter chassis, the POWER LED Lamps are in both front side and back side.)Then the fans began to work ,that shows the power supply of the chassis is normal and stable. The LED Indicator Lamps of converters installed in chassis should indicate valid network connections and working status. Then the chassis began to work stably.
  • 6. If the chassis is with dual power supply ,please turn on both two power supply ,and they will work together. This will extends the life cycle of the power supply, and can make sure the chassis work normally in case one of them broken down.


Fault and Maintenance

1. Finding out the problems.
When the electrical current becomes dangerous ,the POWER LED Lamps of chassis will become red with alarm at the same time .When the problems have been cleared ,the LED Lamps will back to normal.
If the fuse has blown ,or the power supply has broken down ,the POWER LED Lamps will be off ,and the fans will not work.(The fuse is under the plug ,you can pull it out for checking or changing when necessary.)
When the fans of chassis broken down ,the POWER LED Lamps will be normal but the fans will not work. If this happens ,the power supply must be changed for new ones ,and we will do this for users ,you should not do it by yourself ,or you may break up the option s.
If the power supply of chassis is normal ,but the LED Lamps of converters are off ,there might be any problems with the connection between the plug board of chassis and the power supply ,you should stop the electrical current and pull out the power adapter for checking and reinserting.

2.Changing the power supply for new ones
When one of the dual power supply broken down ,the chassis can work normally ,then you should pull out the broken one then pull out the plug from it ,and change it for another new one ,then connect the plug again. When this is been done ,the chassis and converters will keep working.
When single power supply broken down ,just follow the above steps .But when this is been done ,the converters installed in the chassis will stop working until new power supply works normally.


RoHS Compliant 100% Money Back Guarantee

Prices and specifications are subject to change without notice.
Fiberise is not responsible for typographical or photographic errors.

Your Name:


Your Review:

Note: HTML is not translated!

Rating:
Bad             Good

Enter the code in the box below:

captcha


Tags:
Bestsellers
10GBASE-SR SFP+ 850nm 300m
SFP-10G-SR
5 out of 5 Stars! $175.00
5 out of 5 Stars!
1000BASE-SX SFP 850nm 550m
GLC-SX-MM
5 out of 5 Stars! $25.00
5 out of 5 Stars!
1000BASE-T SFP RJ45 100m
GLC-T
0 out of 5 Stars! $45.00
0 out of 5 Stars!
10GBASE-LR SFP+ 1310nm 10km
SFP-10G-LR
0 out of 5 Stars! $399.00
0 out of 5 Stars!