

- Optical Transceivers
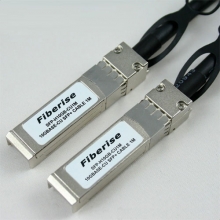
- SFP+ Transceivers
- XENPAK Transceivers
- XFP Transceivers
- X2 Transceivers
- SFP Transceivers
- Compatible SFP
- 3Com SFP
- Alcatel-Lucent SFP
- Allied Telesis SFP
- Avaya SFP
- Brocade SFP
- Cisco SFP
- D-Link SFP
- Dell SFP
- Enterasys SFP
- Extreme SFP
- Force10 SFP
- Foundry SFP
- H3C SFP
- HP SFP
- Huawei SFP
- Intel SFP
- Juniper SFP
- Linksys SFP
- Marconi SFP
- McAfee SFP
- Netgear SFP
- Nortel SFP
- Planet SFP
- Q-logic SFP
- Redback SFP
- SMC SFP
- SUN SFP
- TRENDnet SFP
- ZYXEL SFP
- Other SFP
- FE SFP
- GE SFP
- OC3 SFP
- OC12 SFP
- OC48 SFP
- Copper SFP
- CWDM SFP
- DWDM SFP
- BIDI SFP
- Fiber Channel SFP
- Multi-Rate SFP
- SGMII SFP
- Compatible SFP
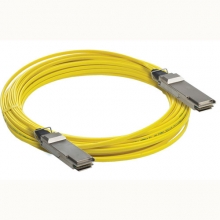
- GBIC Transceivers
- Passive Components
- Networking
- Cables
- Equipments
- Tools
- Special Offers
Brands

Industry News

Fiber Optic Wiki

Fiber Optic Wiki
Testing Loss
December 20, 2011Loss of a cable is the difference between the power coupled into the cable at the transmitter end and what comes out at the receiver end. Testing for loss (also called "insertion loss") requires measuring the optical power lost in a cable (including fiber attenuation, connector loss and splice loss) with a fiber optic light source and power meter (LSPM) or optical loss test set (OLTS.) Loss testing is done at wavelengths appropriate for the fiber and its usage. Generally multimode fiber is tested at 850 nm and optionally at 1300 nm with LED sources. Singlemode fiber is tested at 1310 nm and optionally at 1550 nm with laser sources.
In addition to a power meter, you need a test source
December 20, 2011In addition to a power meter, you need a test source. The test source should match the type fiber ( generally LED for MM or laser for SM) and wavelength (850, 1300, 1550 nm) that will be used on the fiber optic cable you are testing. If you are testing to some standards, you may need to add some mode conditioning, like a mandrel wrap, to meet the standard launch conditions.
In order to mate the reference cables to the cables
December 20, 2011In order to mate the reference cables to the cables you want to test, you need mating adapters. Mating adapters are as important to low connection loss as the quality of the connectors since the mating adapter is responsible for aligning the two connector ferrules correctly. Mating adapters must be kept clean, like connectors and discarded after some number of uses as they wear out from repeated matings.
Fiber Optic Testing
December 19, 2011After fiber optic cables are installed, spliced and terminated, they must be tested. For every fiber optic cable plant, you need to test for continuity and polarity, end-to-end insertion loss and then troubleshoot any problems. If it's a long outside plant cable with intermediate splices, you will probably want to verify the individual splices with an OTDR test also, since that's the only way to make sure that each splice is good. If you are the network user, you may also be interested in testing transmitter and receiver power, as power is the measurement that tells you whether the system is operating properly.
Getting Started
December 19, 2011Even if you're an experienced installer, make sure you remember these things.
Visual Tracing
December 19, 2011Continuity checking with a visual fiber tracer makes certain the fibers are not broken and to trace a path of a fiber from one end to another through many connections, verifying duplex connector polarity for example. It looks like a flashlight or a pen-like instrument with a light bulb or LED source that mates to a fiber optic connector. Attach the fiber to test to the visual tracer and look at the other end of the fiber to see the light transmitted through the core of the fiber. If there is no light at the end, go back to intermediate connections to find the bad section of the cable.
Featured


Bestsellers


Registered Names and Trademarks are the copyright and property of their respective owners.
Copyright © 2026 Fiberise(A company of Cablexa Ltd). All rights reserved.
Copyright © 2026 Fiberise(A company of Cablexa Ltd). All rights reserved.
